


Why we need it and how to use it
by Eli Liu
Sep 1st, 2020
Get rid of the SD card or cable when you use 3D printers. Control your printers from ANYWHERE by using your smart devices.
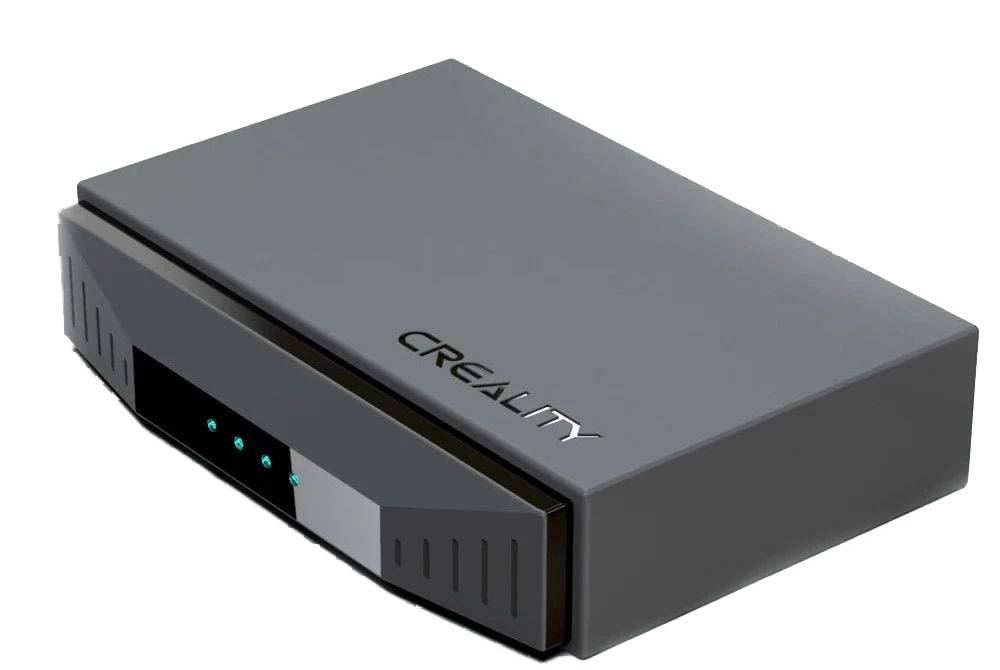
The Creality Wifi Box(CWB) will bring a new revolution of wireless connection for 3D printers.
Reasons to use Creality Wifi Box

For most of the DIY 3D printers, they can only read the Gcode files by inserting an SD card or connecting it to a PC. It’s kind of out of the date if we think that we live in 2020! But it is the truth. Some people start to find new ways to let the 3D printers join in the modern world—-Be wireless. OctoPrint, for example, is a successful approach for wireless printing. OctoPrint is a web interface for 3D printers that allows users to control and monitor all aspects of 3Dprinters. However, OctoPrint is hard to set up. Users have to go through many settings on their devices to get it working. What’s more, OctoPrint works with Raspberry Pi, which means you have to buy a Pi for more than $50.

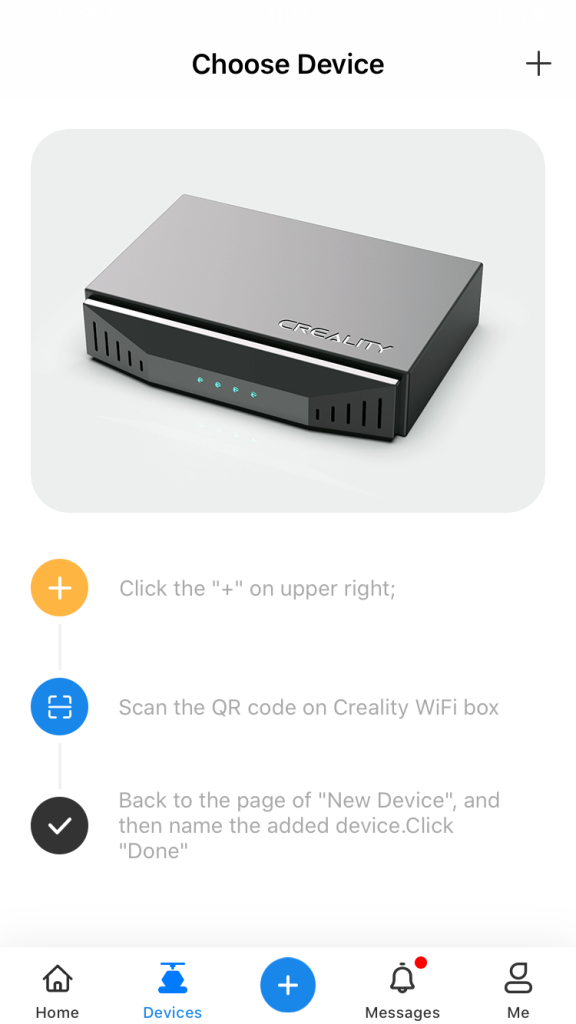
Creality Wifi box provides an easy way to connect your 3D printers with your smart devices like smartphones and tablet. All you need to do is connect the Wifi box to a power adapter and a 3D printer, download the Creality cloud APP on your smart devices and add the box to your account by scanning the unique QR code on the box.
More importantly, Creality Wifi Box truly accomplishes the meaning of wireless. Although OctoPrint is very powerful, it is limited within the 3D printer area. You control devices have to be placed at the same network as your connected 3D printers. once the CWB is linked to your Wifi and smart devices, you can remote the printer from literally anywhere as long as you have internet.
Summary
Creality Wifi Box provides a new 3D printing experience. It is very friendly for general 3D printer users because the CWB is easy to get installed to your network. Also, the Creality Cloud offers an energetic and creative community where users can download unlimited STL files for free, and share their models.
Features of CWB
- Cost-effective (~19.9 USD)
- Easy installation
- Remote&Print from anywhere
- Creality Cloud(free stl models, idea sharing, on-line slicing and printing)
HOW TO USE CREALITY WIFI BOX
Step 1 Open Box

When the CWB arrives, it contains 1x Wifi box, 1x Power Cable(micro USB), 1x Guide Book. To be noticed, there is no cable prepared for connecting a 3D printer, since each printer may have a different USB port. Also, there is no power adapter. You can use any cellphone adapter that is 5V/2.4A(≥2A) for a power supply.
Step 2 Set Up a Wifi Box
There is a detailed introduction in the Guide Book that shows all the steps we have to follow to get the box working. Here, I will demonstrate these steps from a user aspect and try to explain everything as much as I can. After all, some small things are easy to overlook.
I read the Guide Book and connect my Wifi Box to a power supply and a printer. (I use a CR-6SE as a test machine)

As showed in the figure on the left, the blue cable is connected to a power adapter; the white cable is connected to the printer.
Note: a formatted TF card has tobe inserted to the Wifi Box as a hard drive.
Wifi Box will not work without this card!
Step 3 Link to Smart Device
Download the Crealiy Cloud App. This App supports both IOS and Android system. Simply search “Creality Cloud” at your App store on an iphone, for instance, and you will find infomation like below:


. you can use a phone number, email to sign up an account. Also, you can go to https://model.creality.com/model to do the same thing.
Once you create an account, you can add device, download/share STL files, remote printer etc. Now we have a few step left.
Thirdly, we connect a Wifi Box to our smartphone.


.jpg)