


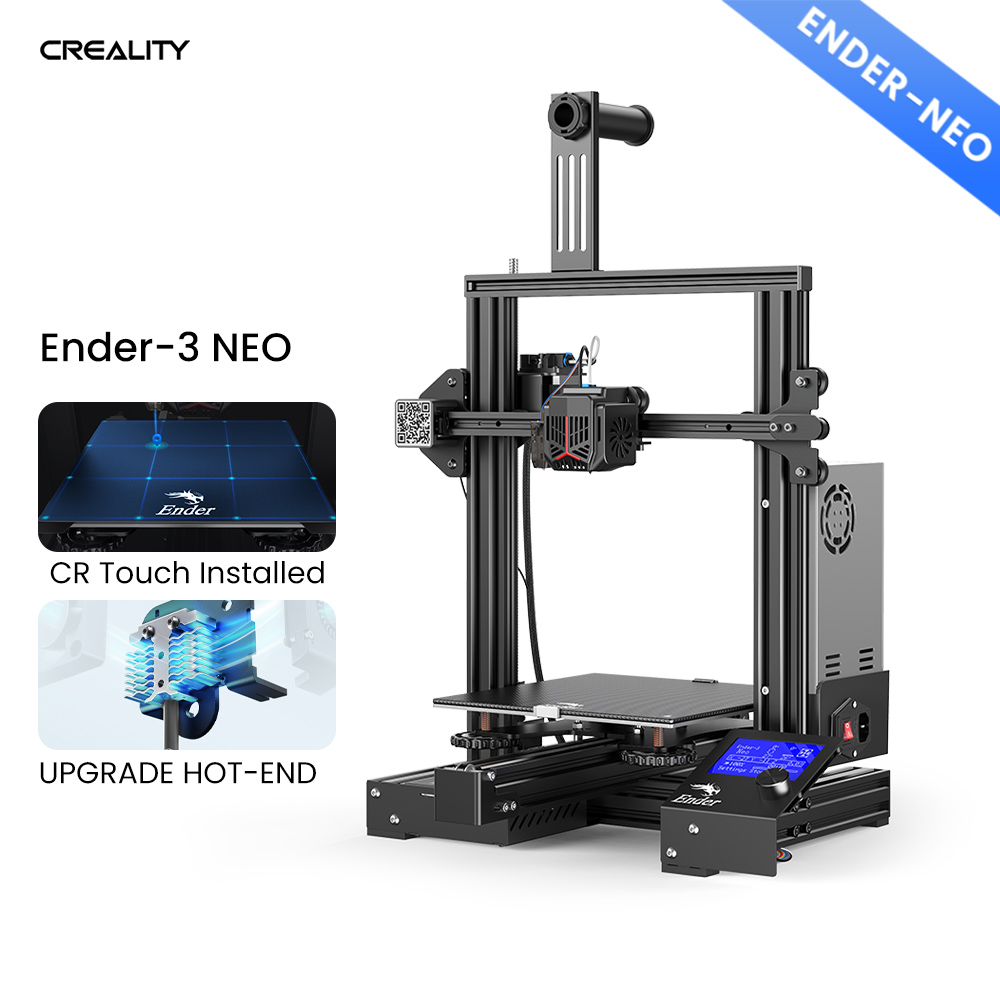

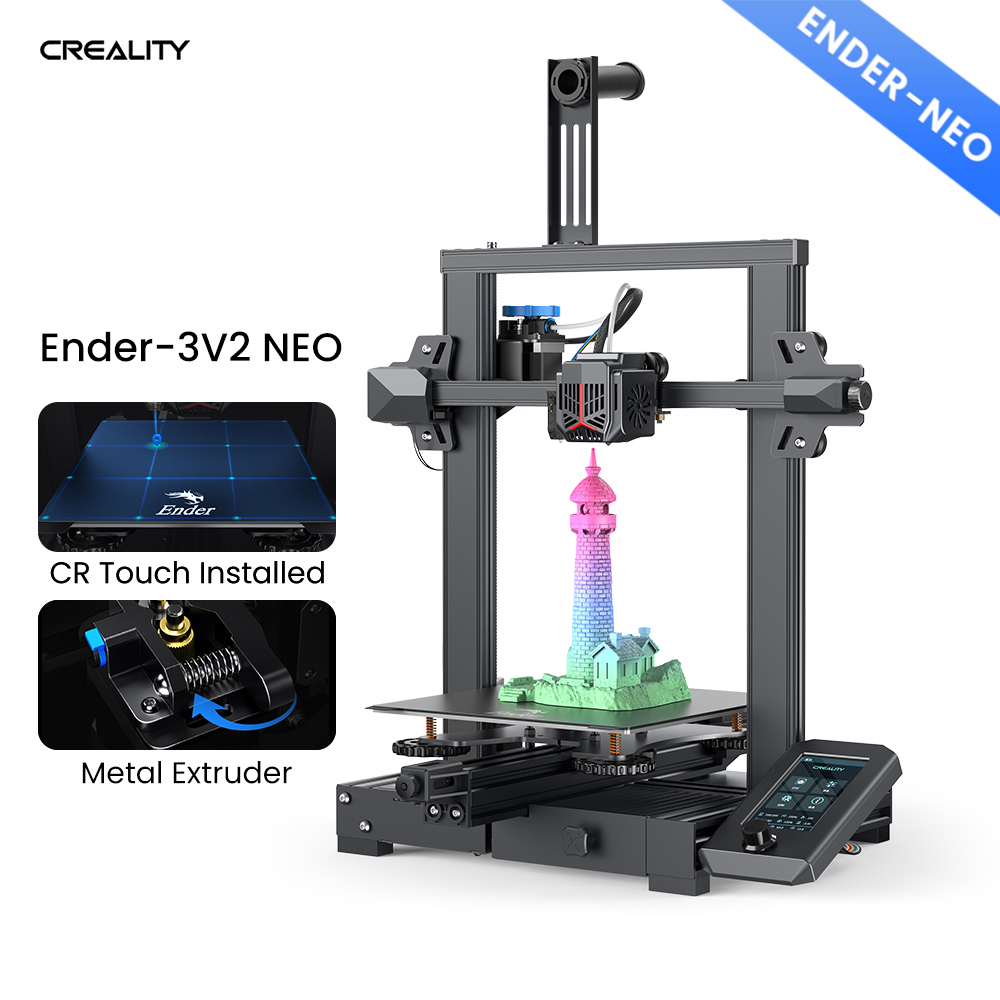
Imprimante 3D améliorée Ender-3 NEO CR Touch ABL installée
$ USD
$ USD
Ship From
Model-1
Please select product attributes before purchasing~~
Ship to
It is expected to arrive within and will cost
$
USD to ship
This item can't be shipped to this Country/Region
Bundles
${ meal.title }
${ meal.skus }
${ sku.name }:
${ skuVal }
$${
meal.price }USD
$${
meal.oldPrice }USD
Quantity
28 Available
Add To Cart
Buy It Now
Imprimante 3D améliorée Ender-3 NEO CR Touch ABL installée
${propertiesText}
x ${productNum}
Added to the cart
Continue To Shopping
View Cart
People who bought this item also bought

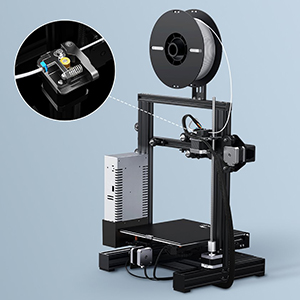
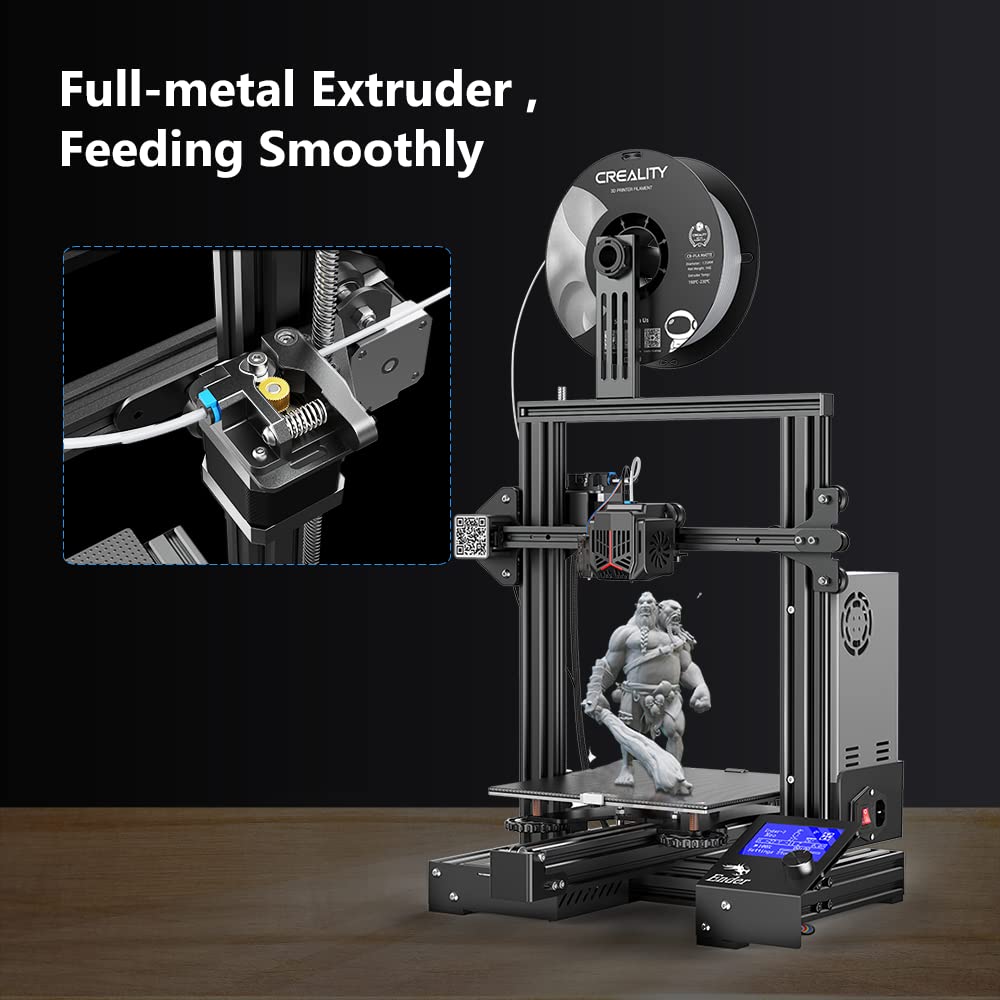
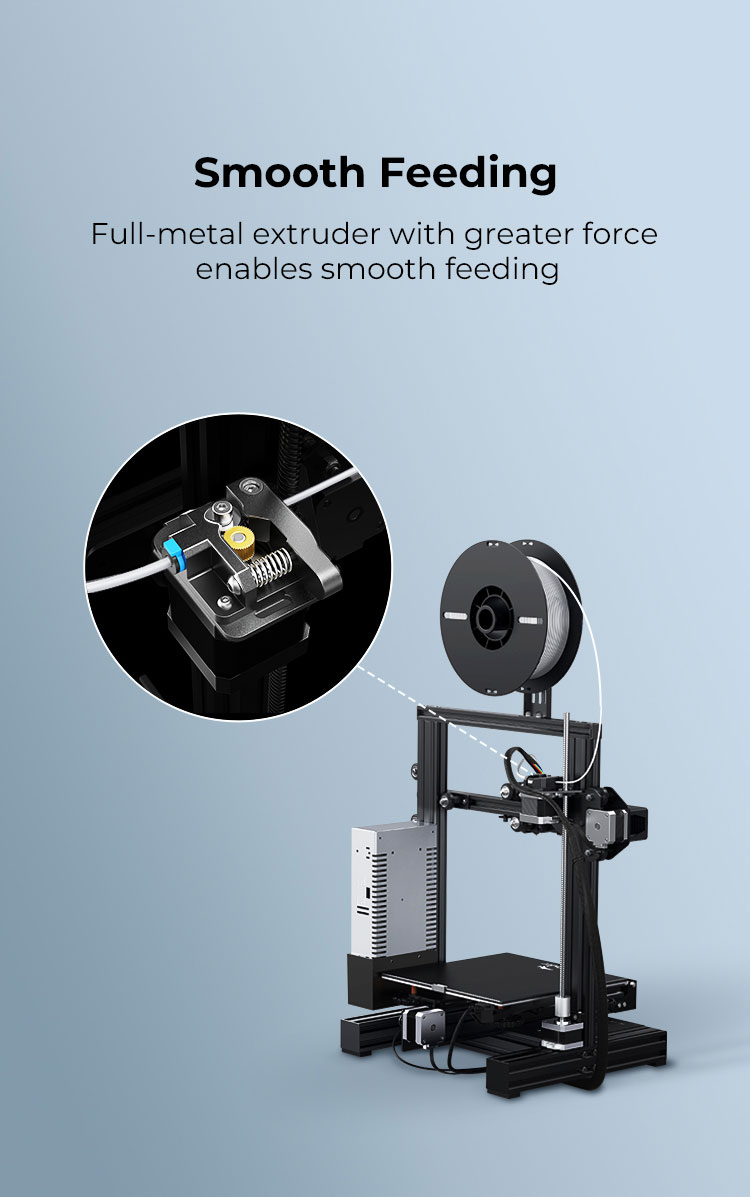
Alimentation en douceur
L'extrudeuse entièrement métallique avec une plus grande force permet une alimentation en douceur.
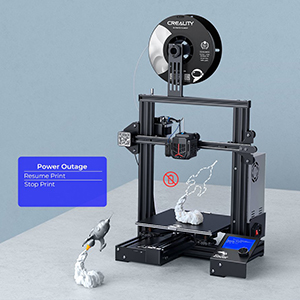
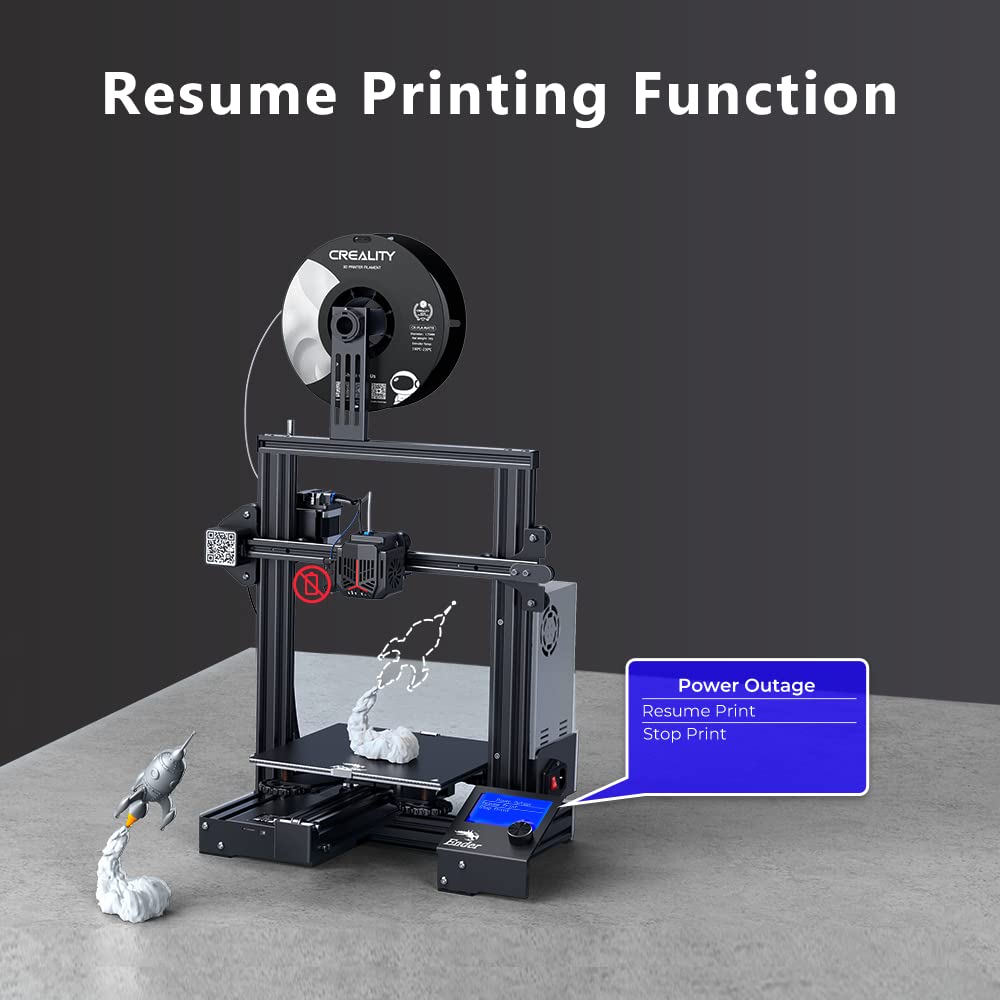
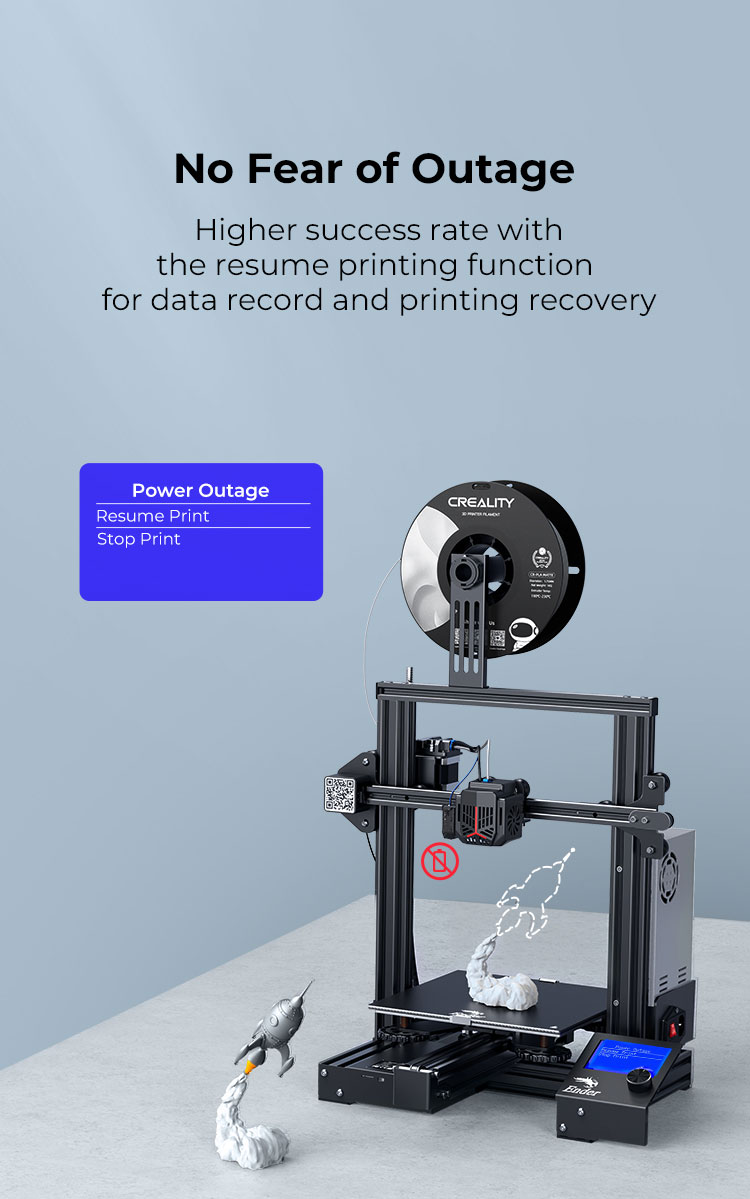
Pas de crainte d'une panne de courant
Taux de réussite plus élevé grâce à la fonction d'impression de reprise qui enregistre les données en cas de panne de courant, puis récupère l'impression une fois que l'appareil est à nouveau sous tension.
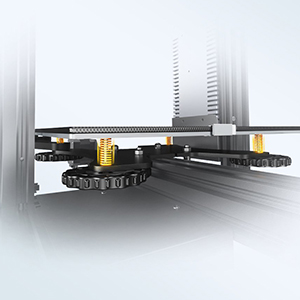
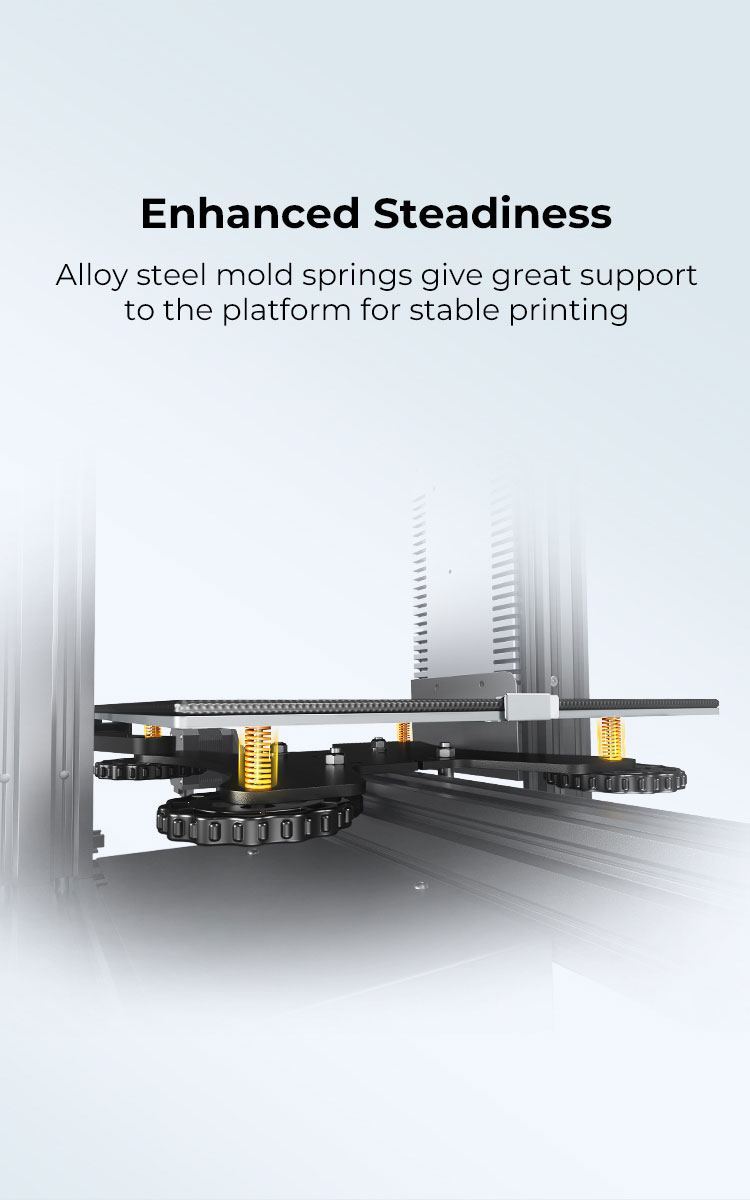
Stabilité améliorée
Les ressorts de moulage en acier allié offrent un excellent soutien à la plate-forme pour une impression stable.
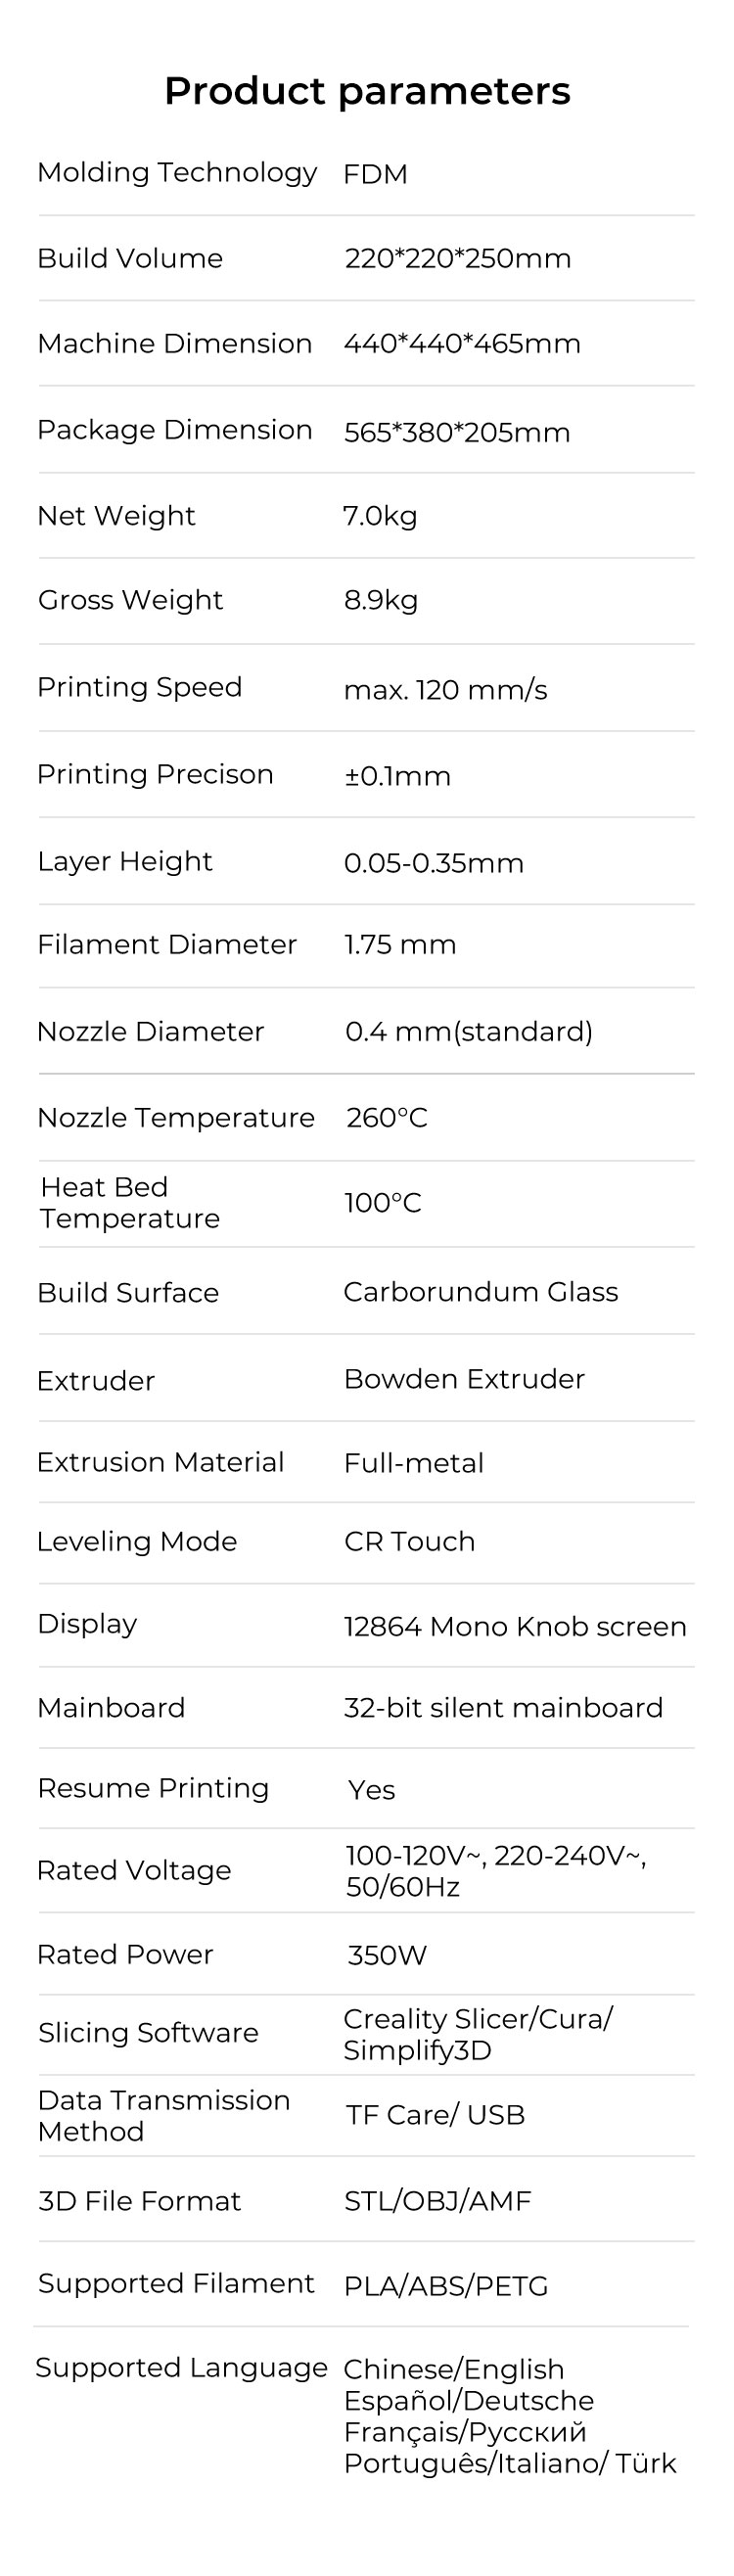
Paramètre produit Ender-3 NEO
| Volume de construction | 220* 220* 250 mm |
| Dimension de la machine | 440* 440* 465 mm |
| Vitesse d'impression | 120 mm/s max. |
| Précision d'impression | ± 0,1 mm |
| Hauteur de la couche | 0,05-0,35 mm |
| Diamètre du filament | 1,75 mm |
| Quantité de buses | 1 |
| Diamètre de la buse | 0,4 mm (standard) |
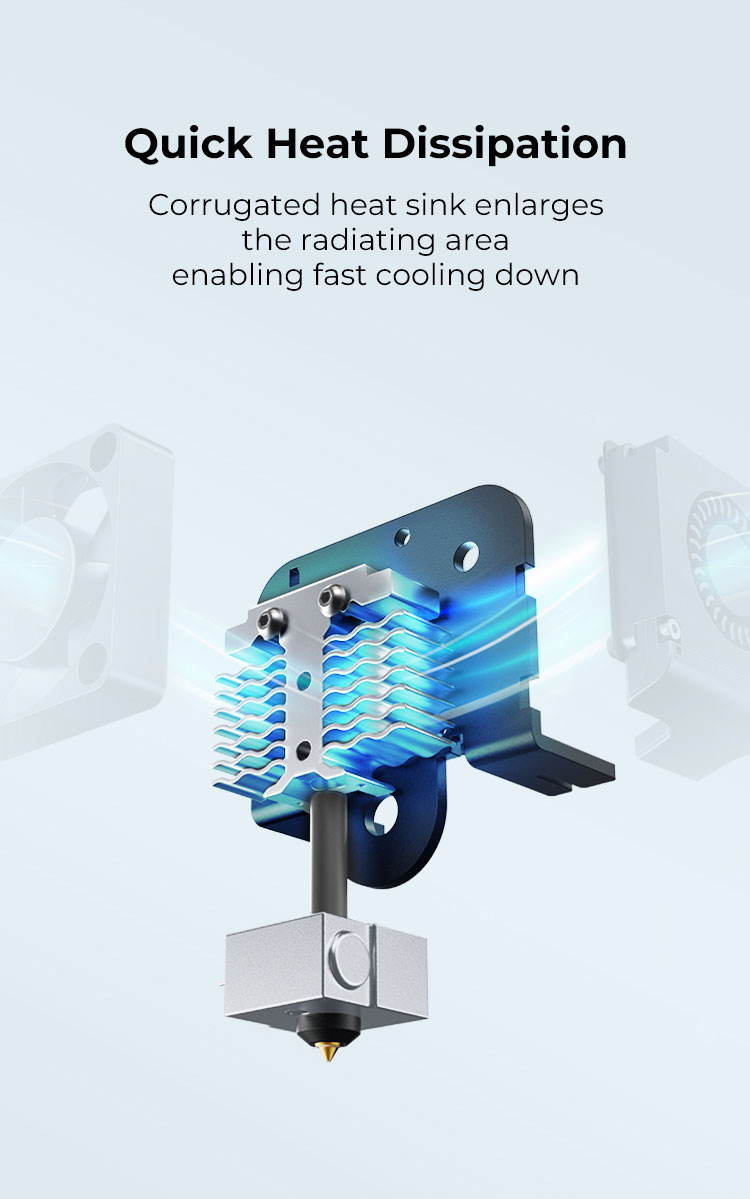
| Température de la buse | 260 ℃ |
| Température du lit chauffant | 100 ℃ |
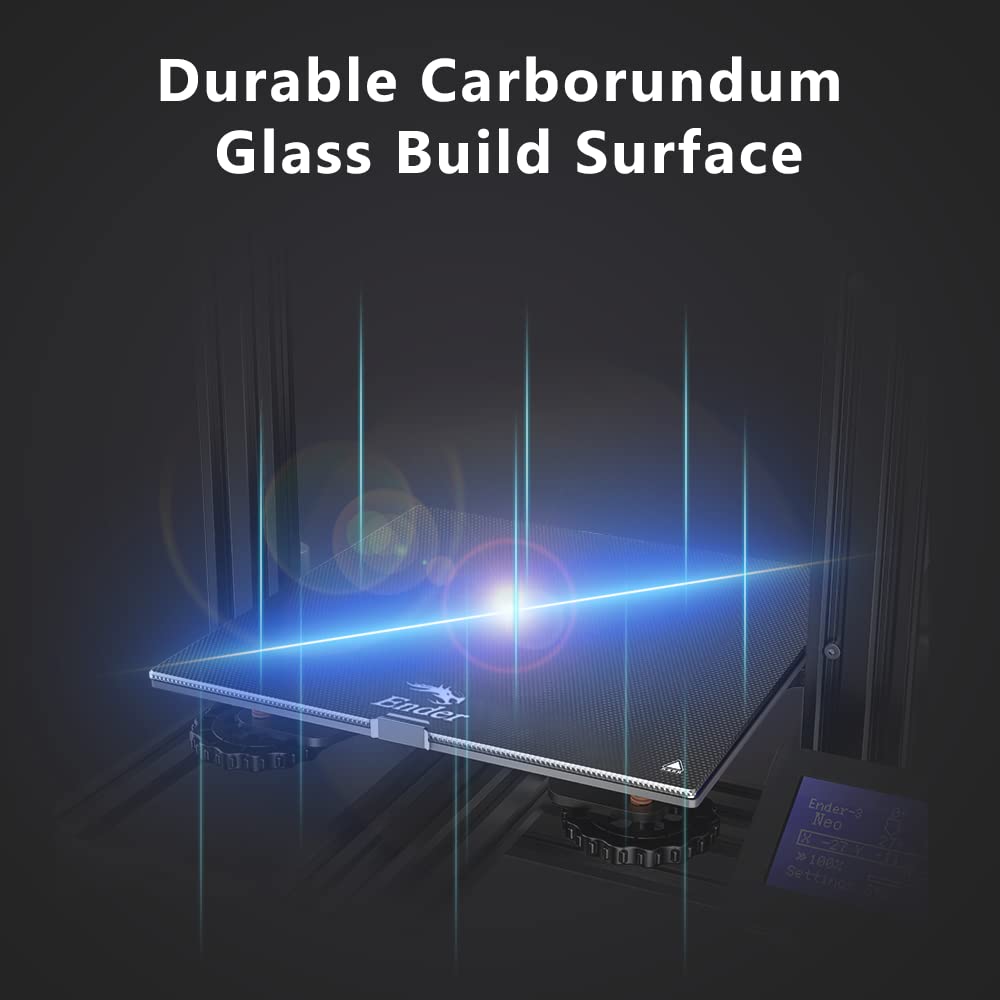
| Surface de construction | Verre au carborundum |
| extrudeuse | Extrudeuse Bowden |
| Matériau d'extrudeuse | Entièrement métallique |
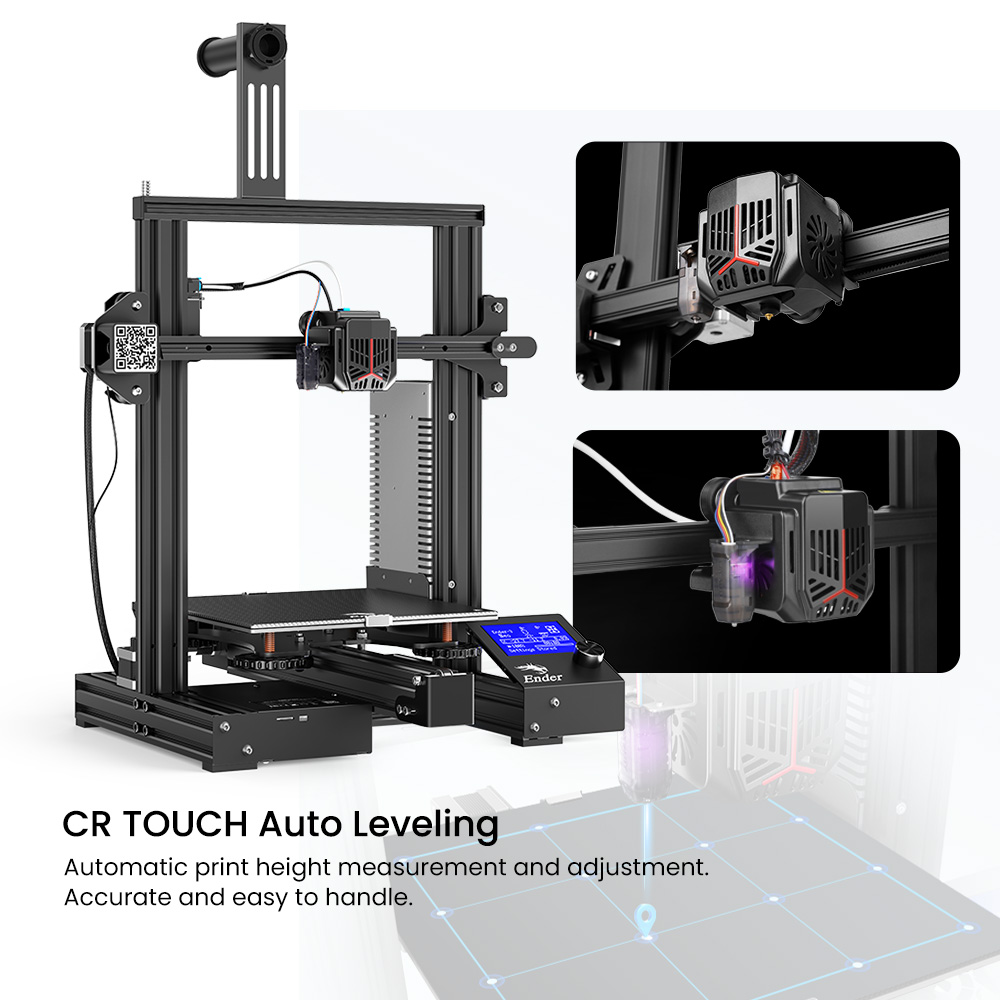
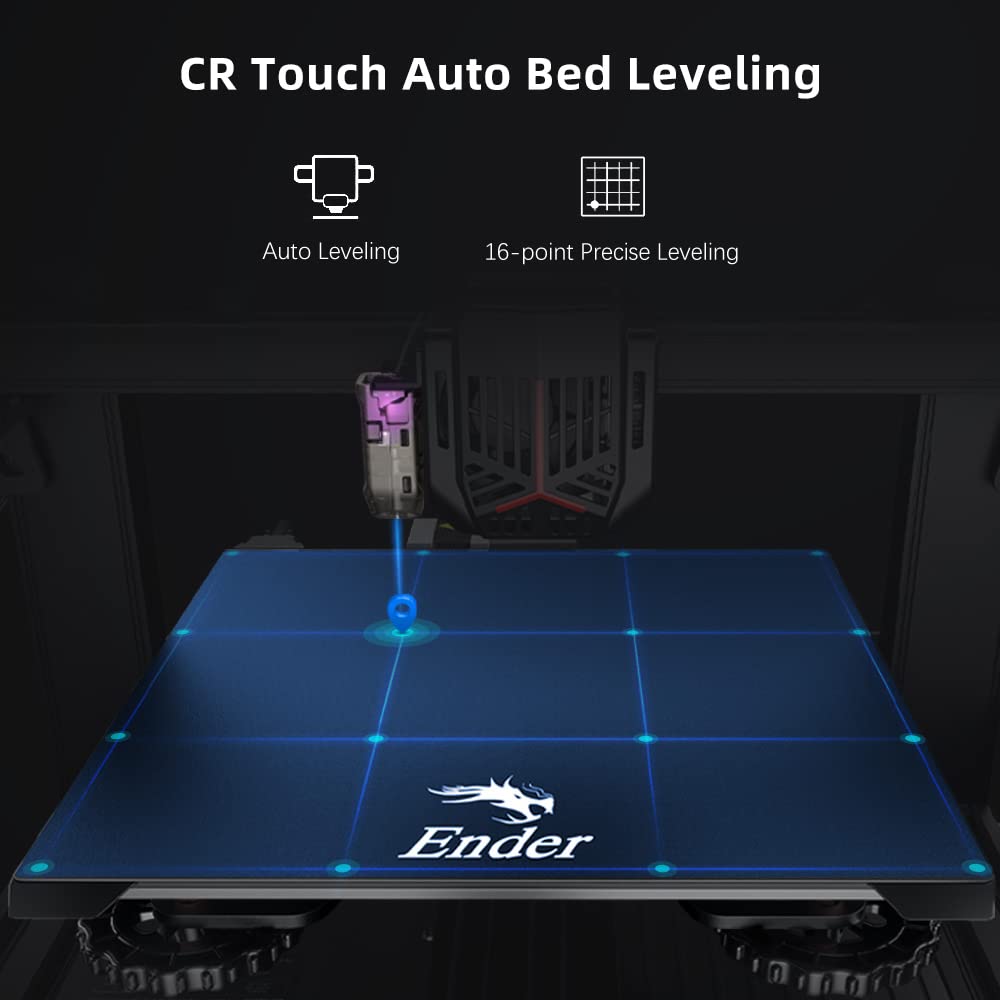
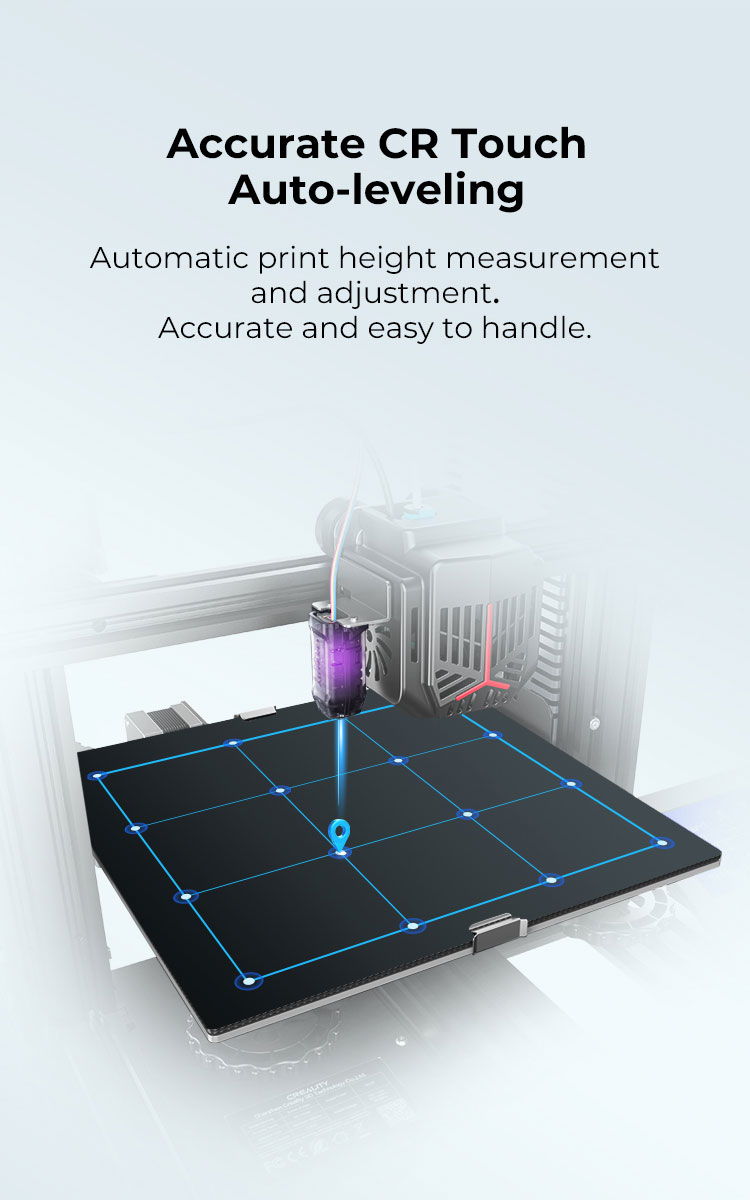
| Mode de nivellement | Tactile CR |
| Afficher | Écran Mono Knob 12864 |
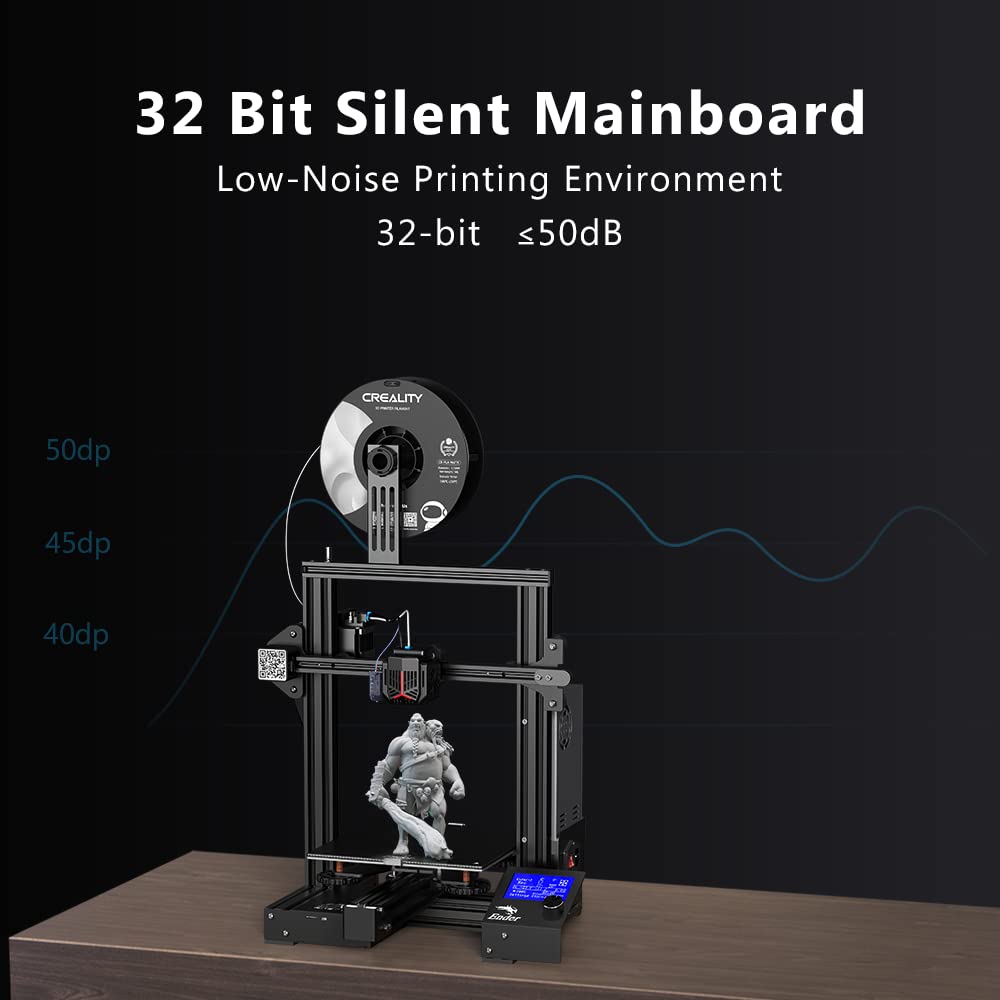
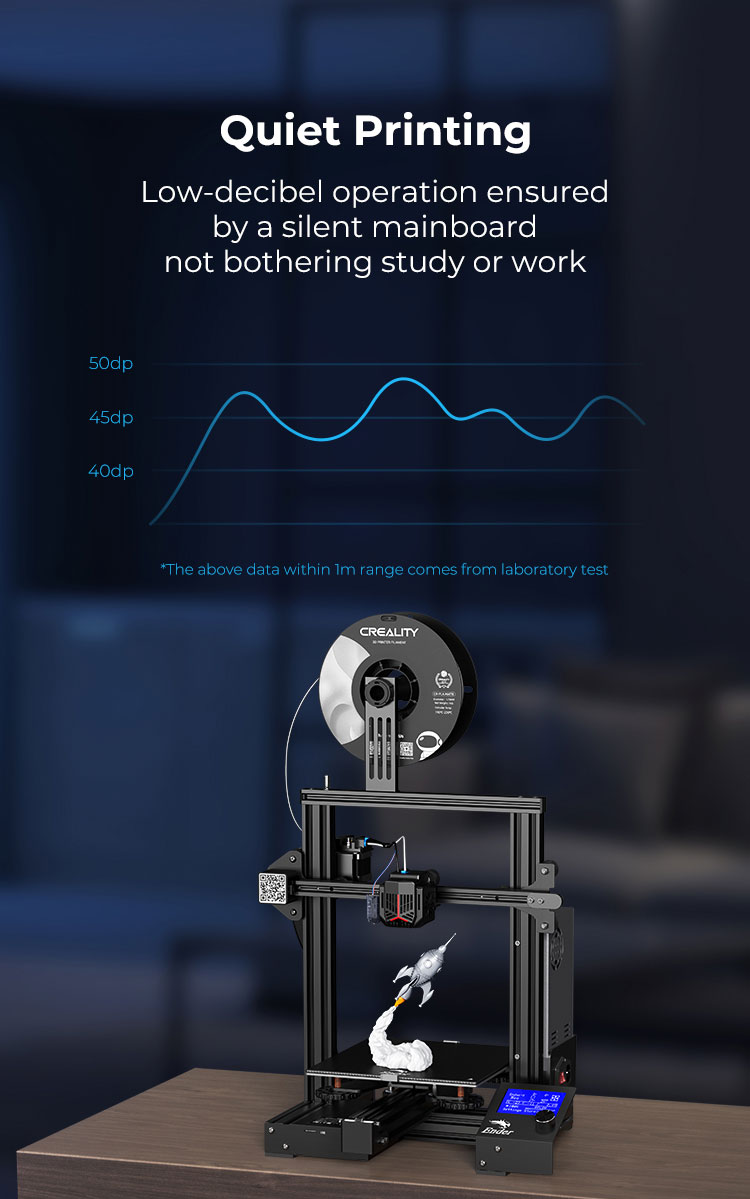
| Carte mère | Carte mère silencieuse 32 bits |
| Impression de CV | Oui |
| Puissance nominale | PUISSANCE DE CRÉALITÉ 350 W |
| Logiciel de tranchage | Creality Trancheur/ Cura/Simplify3D |
| Méthode de transmission des données | Carte TF/USB |
| Filament supporté | PLA/ABS/PETG |
| Langue prise en charge | Chinois/Anglais/Espagnol/Allemand/Français/Russe/Portugais/Italien/Turc |

Customer Reviews
Based on 7 reviews
71%
(5)
29%
(2)
0%
(0)
0%
(0)
0%
(0)
Write A Review
Ask A Question
Huey Francis
I've seen plenty of bad reviews on this printer, but my initial impression is quite the opposite. Although the setup process was rather lengthy, at least for me at 65 years old, the printer has been a gratifying change from my first printer which was an Anycubic Mega S. The operation is smooth and precise, but the most important features to me are the auto bed-leveling and the quietness of the machine. The few prints that I've done have come out very well! Those who have had issues might want to keep in mind that the setup of the machine is important for good 3D prints. Be sure to tighten up the nuts that are pointed out in the various YouTube videos that you can find online. So far, so good. Hopefully, I don't return here later to complain!!
Vicky
Awesome service from Comgrow. Had an issue with a part and they were fast to reply, investigate and ship out a replacement part.
Mathias V.B
100% satisfait de cette imprimante :
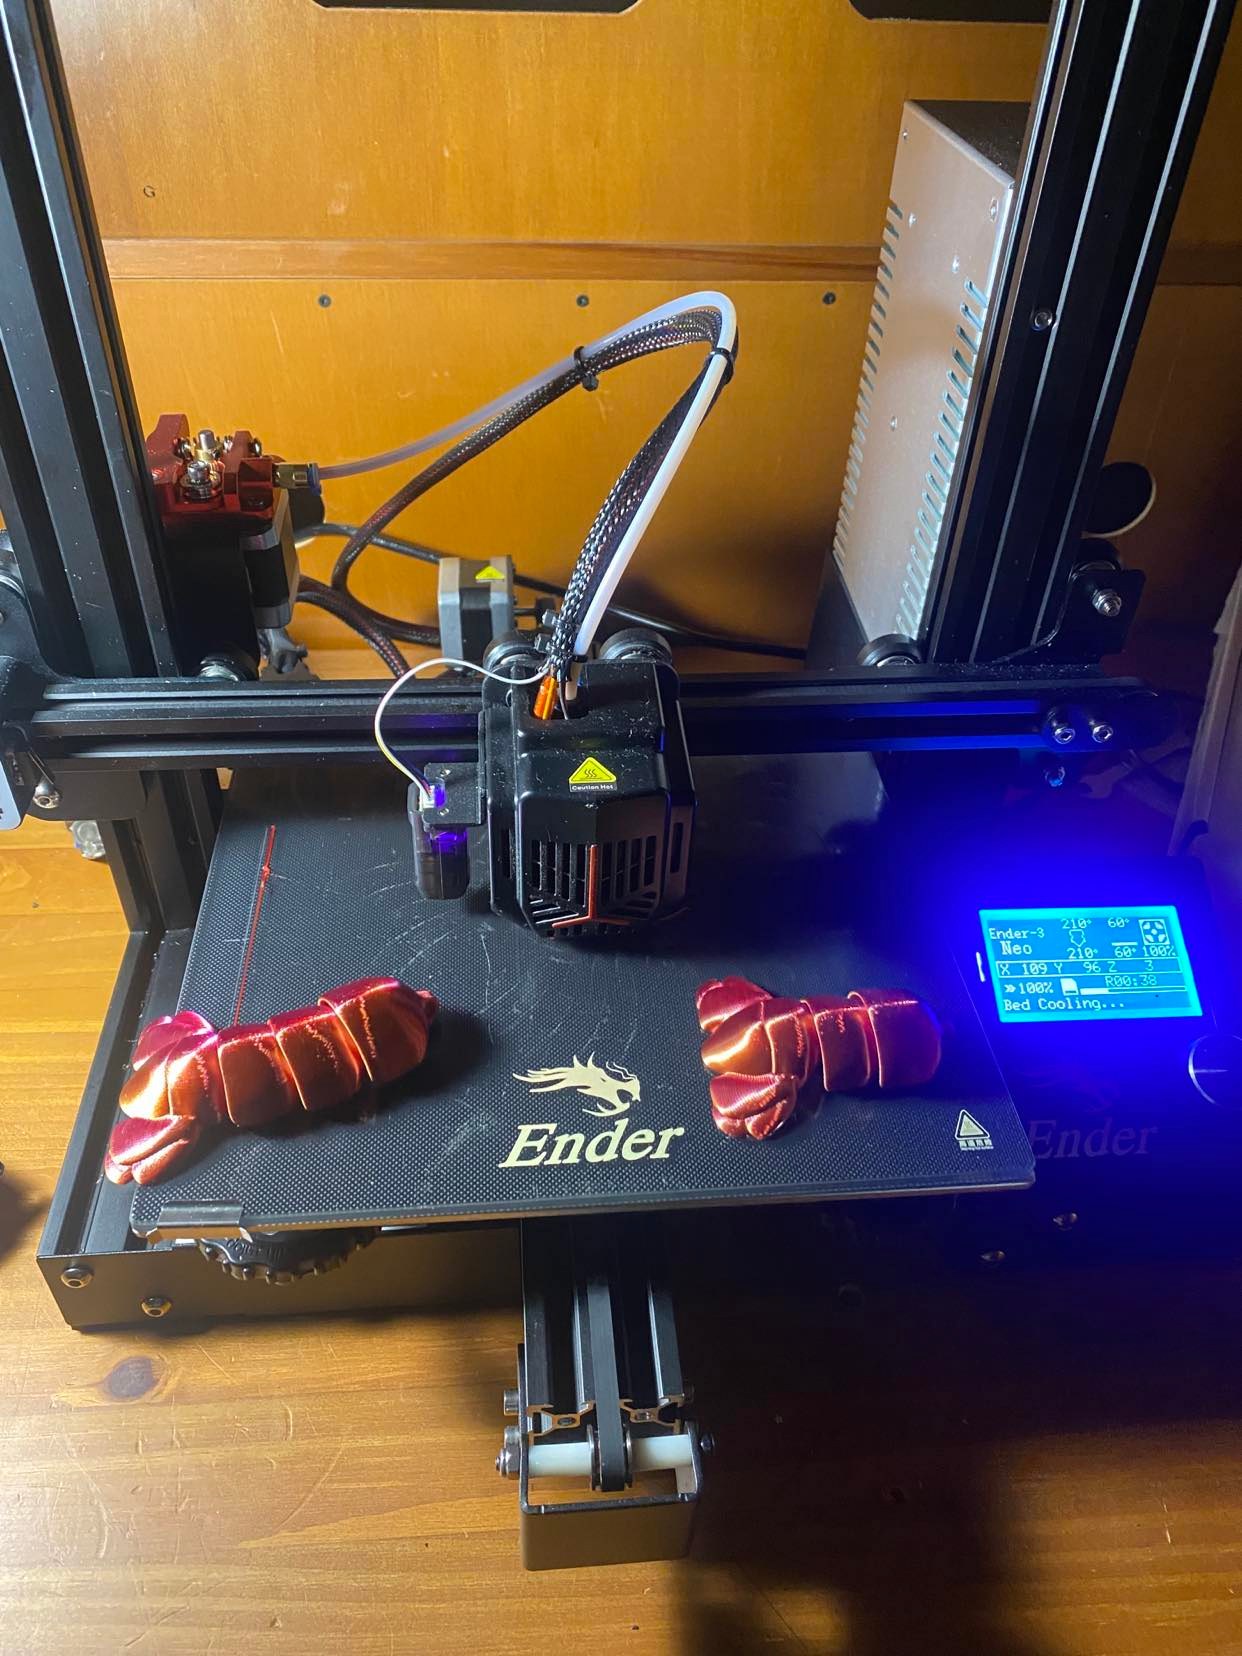
(N'hésitez pas a regarder les images joints pour voir les rendus)
Les points possibles ;
1.Possibilité de reprendre une impression après coupure de courant
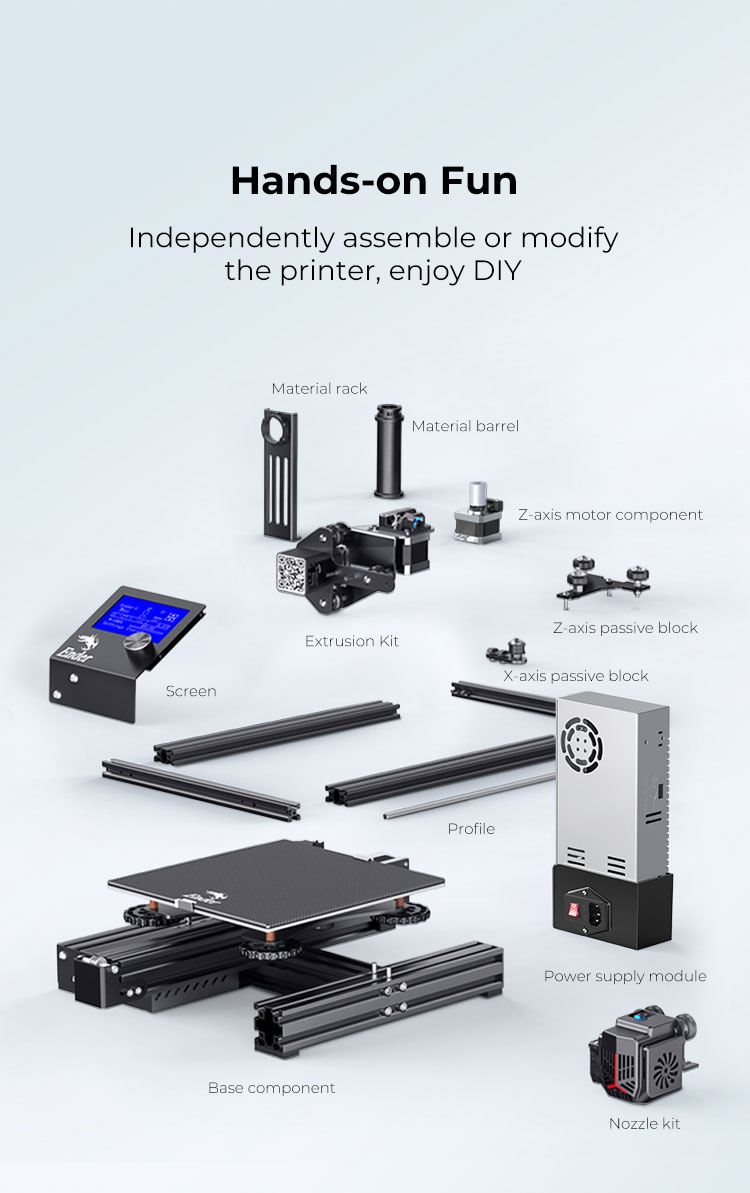
2.facile a prendre en mains et à monter : en effet j'étais novice dans le milieu et après seulement deux soirées j'ai pue commencé à imprimer.
3.grande superficie d'impression (220x220x250mm)
4.ecran facile d'utilisation et disponible en francais (même si le francais n'es pas des mieux traduit) permet de mettre en pause pour changer de filaments mais aussi modifier des réglages de température ou ventilateur dn cours de route.
5.auto leveling (attention il ne vous dispose pas des réglages du lit mais permet de corriger les problèmes lier au mauvais réglage(
6.Dispose de tout les outils nécessaires pour débuter (grattoir, pince coupante coudé, 3 clef à écrous, une buse de rechange, un tourne visse, un adaptateur micro sd vers usb et un lot de 5 clef a len)
Kimberly Gerlach
This is my first 3D printer. It was partially assembled. Assembling instructions had detailed enough pictures and parts were labeled clearly. I had to google how to do the manual bed leveling because there were no instructions for it. After that the machine does the leveling automatically. I had good print quality with no calibration. The ender 3 community online is huge and helpful and there are lots of mods if you want to customize your machine.
James Cheves
To be honest, I had really anticipated that putting this printer together wouldn't be much of a problem. However, trying to figure out some of the various orientations for the print head, z-axis, etc., etc., left me a bit befuddled. I think it would have gone better if the parts were individually labeled -- A1, A2, B1, B2, etc.. Also adding to MY confusion was the orientation. At 72, I may be an old fuddy-duddy, but back in the day, I managed to assemble various HeathKits with very little problems (aside from needing a certain amount of digital dexterity). Included was the printed assembly guide (Quick Start Guide), and nothing else. The Micro SD card had 3 files on it, two of which were .gcode (not very helpful for the assembly process). The third file was a .rar, which left me in a no-man 's land in terms of anything useful.
Eventually, by a combination of fussing, fuming, and outright swearing, I managed to get the mechanical assembly completed. Then the real fun began -- leveling the bed. Oh, my God, Harry!!!!!! Every twist I made seemed to produce opposite results. I had viewed various You-Tube tutorials, and thought I was well prepared, but this was not the case. Since I'm using OctoPrint, I was able to download and install the "bed visualizer", and after running through the process many times, I managed to get a configuration that allowed me to run through various tests without too much of a problem (patience and perseverance are the key here).
The included glass bed does a great job of providing adhesion -- so much so that the metal spatula is a must for removing prints. However, I found that by using another glass bed, with a piece of PEI on top, not only made for prints that were easier to remove, but also provide a 'mirror-smooth' surface on the bottom, which makes for a much nicer presentation if you're making name tags, etc..

Eddie Parks
For those of you just getting started in 3D printing. I highly recommend this printer. A friend bought the base model and between the two the few upgrades make printing that much easier.
Jackson Gould
Q
When the Ender-3 Neo available? Does it use a Meanwell Power Supply?
A
It was a Crealiy Power Supply
Peng Chen
Q
The mainboard is the 4.2.2 or the 4.2.7?
A
The mainboard is the 4.2.2GD TMC2208 driver
peicre
Q
The advertising pitch says "full-metal extruder". is this really an all-metal hot end capable of high temperature printing or a scam lie?
A
I think you have some confusion, the extruder is the part that pulls the filament through the Bowden tube to the hot end. The original Ender 3 series printers all came with a plastic extruder that the arm (piece you push in to be able to manually feed filament through the extruder) would crack and break over time. this comes with the upgraded all metal extruder.
Coffeeaddict
Q
what is the environment operating temperature? I plan to use it in a room that could get down to 60 degrees F.
A
I've printed in a colder room than that but to keep it more controlled, I just got an enclosure for it. It depends what filament you use and your settings too. You should be fine unless it gets colder than that or you have cool air moving around it.
$
USD
$
USD
ADD TO CART
BUY IT NOW
Write a review
*Name
*Email
*Body of Review
*Rating
Customer Image
Submit Review
Ask a Question
*Name
*Email
*Question
Submit Question